Running bitwarden_rs on Synology using docker-compose

On the last posts, I wrote about installing, activating live sync and backup bitwarden_rs on Synology NAS using docker container. After playing around with docker on Synology (I’m a newbie on docker myself ), I found out that docker compose is also available on Synology. So we will be running bitwarden_rs on Synology using docker-compose, and write the settings in one file. Every container created per docker-compose are shown on docker GUI in Synology DSM.

Let’s get started rebuilding our bitwarden_rs container using docker compose.

Continue reading Running bitwarden_rs on Synology using docker-compose

Backup bitwarden_rs data on Synology

In the last post, I wrote about installing bitwarden_rs per Docker on Synology and how to activate live sync. Now I’ll show you how to backup the data. I’ll use bruceforce/bw_backup docker to dump the sqlite database automatically, since just copying the sqlite3 file is not really backing up the database. I also found out, that the created dump file won’t be automatically uploaded to cloud by the Cloud Sync. Some how Cloud Sync doesn’t notice that there’s a new file.

Continue reading Backup bitwarden_rs data on Synology

Activating Bitwarden live sync on Synology

In my last post I showed how to install bitwarden_rs, an unofficial fork of bitwarden server, on a Synology Diskstation using docker. Now that everything works, I’ll show you how to activate live sync functionality on Synology. It’s not really easy, but doable. We need to add location based reverse proxy in Synology Nginx.

Basically we need to do 3 things:

  • enabling WebSockets in Docker
  • add new location in the reverse proxy
    Problem is, that we can’t do this in DSM GUI
  • open the WebSockets port in your router

UPDATE: change path to certificate and nginx command for DSM 7.0

Continue reading Activating Bitwarden live sync on Synology

Installing bitwarden on Synology Diskstation

Until lately I had been using 1Password as my trusted password manager. I had been using it since 1Password 4 and lately bought the upgrade to 1Password 7 for Mac and Android. Syncing between devices was done by using Dropbox. It was pretty easy. But then it was time to share some passwords with my wife. I was looking the possibilities. Creating 1Password vault and shared it per Dropbox, or using the 1Password for families for 4,99 USD per month. Other alternatives, such as Lastpass, Dashlane and Bitwarden, are subscription model and you need to upload your password to their server.

But Bitwarden advertises itself as open source and can be self-hosted. But although it’s self-hosted, you have to pay the monthly subscription to use all the features. Then I came to an unofficial implementation of the Bitwarden server written in Rust, called bitwarden_rs. It has all the official Bitwarden’s features minus the subscription.

Continue reading Installing bitwarden on Synology Diskstation

Synology NAS as backup drive

Using Apple TimeMaschine to backup entire Macbook is an easy step. But what about files, which are shared between users/devices? here comes a Synology NAS to help.

I’ve been using Synology since DS207. Now a DS216+ saves all the precious data and pictures. As I wrote, backup a Mac with TimeMaschine on a Synology DiskStation is an easy step. But what about shared file on cloud platform like Dropbox, Google Drive and so on? Synology can handle that too :)

Update on Google disabling sync of Photo to Drive

Continue reading Synology NAS as backup drive

Connection refused after installing DSM 6.0 Beta

After installing the newly released DSM 6.0 beta for Synology NAS, I was unable to reach the DSM again. My Chrome browser showed “Connection refused”. Not really a good start for beta testing new software. connection-refused

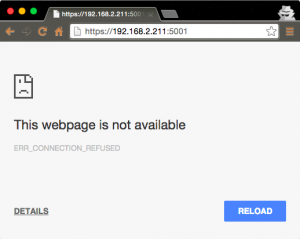
Luckily SSH is still up. Since DSM running on nginx, it’s straightforward to look for some error log in the nginx error log.

shows following log records

in the file /usr/syno/etc/ssl/ssl.chain.crt/server.crt I found a weird certificate formatting

There’s a missing newline between the chained certificate. Put a new line between the certificate and restart nginx.

and restart nginx

Tadaaaa… DSM is available again.