Until lately I had been using 1Password as my trusted password manager. I had been using it since 1Password 4 and lately bought the upgrade to 1Password 7 for Mac and Android. Syncing between devices was done by using Dropbox. It was pretty easy. But then it was time to share some passwords with my wife. I was looking the possibilities. Creating 1Password vault and shared it per Dropbox, or using the 1Password for families for 4,99 USD per month. Other alternatives, such as Lastpass, Dashlane and Bitwarden, are subscription model and you need to upload your password to their server.
But Bitwarden advertises itself as open source and can be self-hosted. But although it’s self-hosted, you have to pay the monthly subscription to use all the features. Then I came to an unofficial implementation of the Bitwarden server written in Rust, called bitwarden_rs. It has all the official Bitwarden’s features minus the subscription.
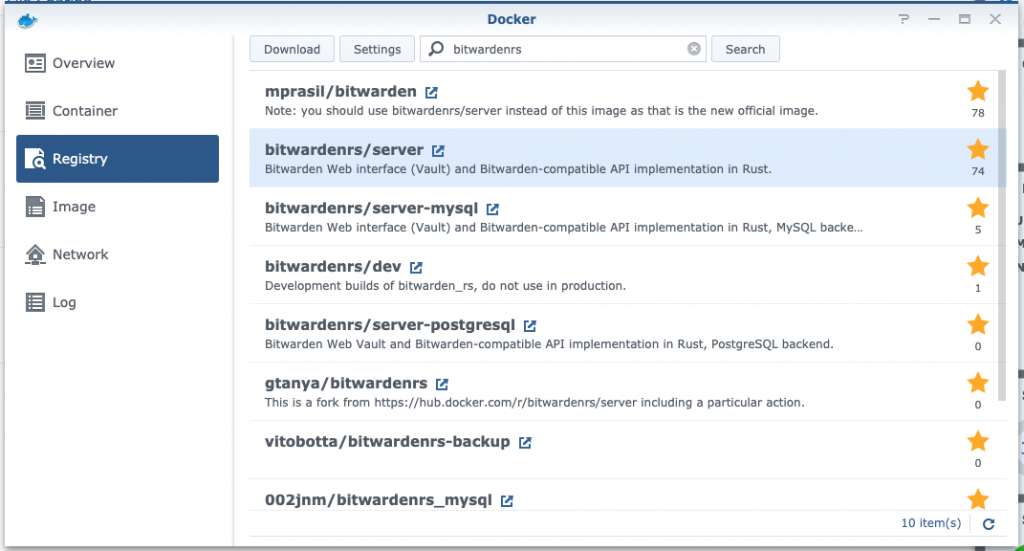
Since bitwarden_rs has a docker image and my Synology Diskstation 218+ can run docker application, why not try to host it on Synology :)
Docker bitwarden_rs
First install Docker from the Package Center. After that run the Docker package, go to Registry and search for bitwardenrs and download the image. I use only the bitwardenrs/server image. It will save your data in a sqlite3 database.
After the image is downloaded, let’s launch it.
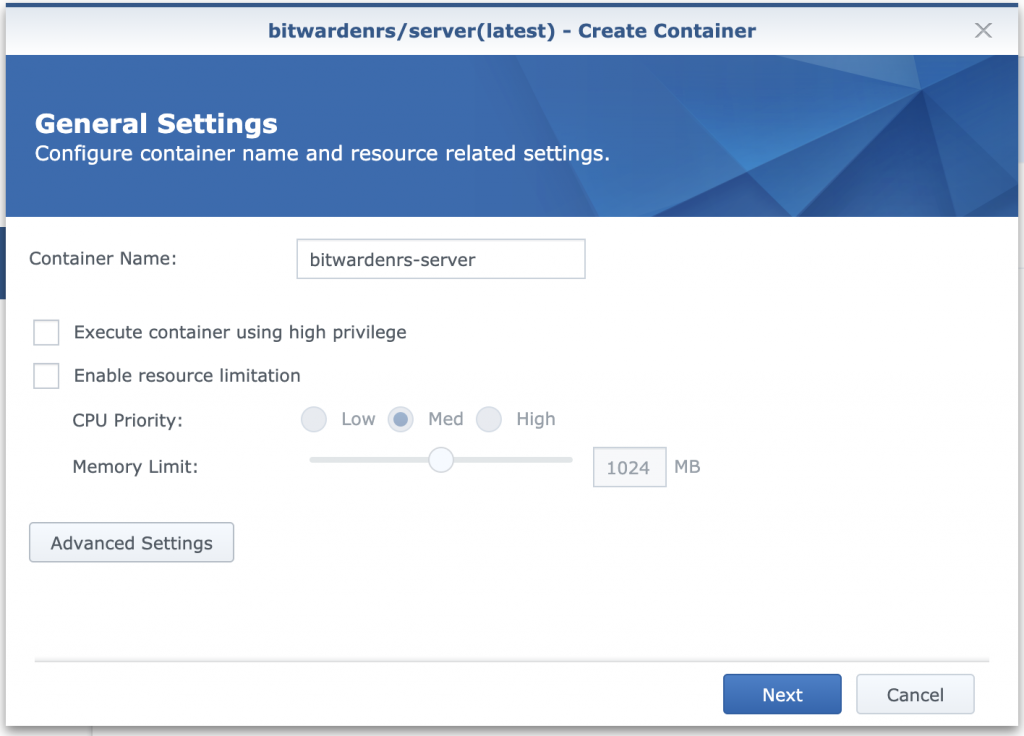
I’ll name it bitwardenrs-server and then let’s click the advanced settings so we can mount a volume…

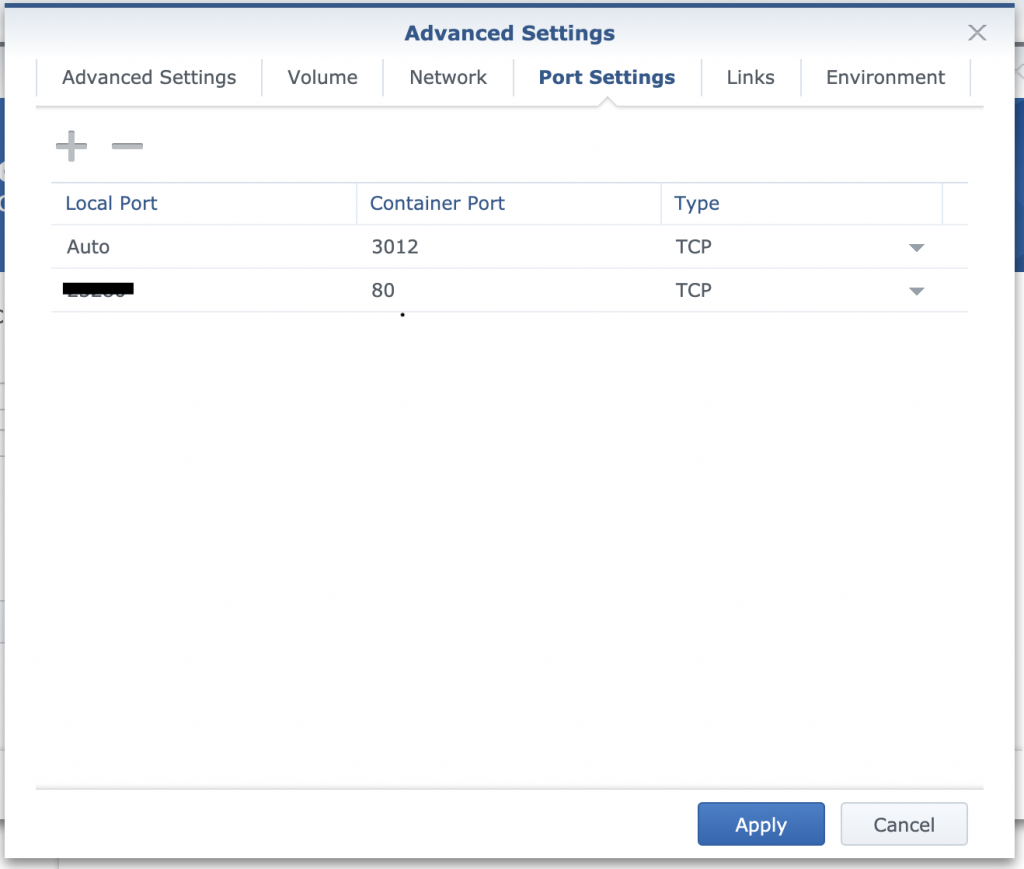
and create a new port mapping. This port will be used later to create a reverse proxy, so the instance is reachable from the internet.
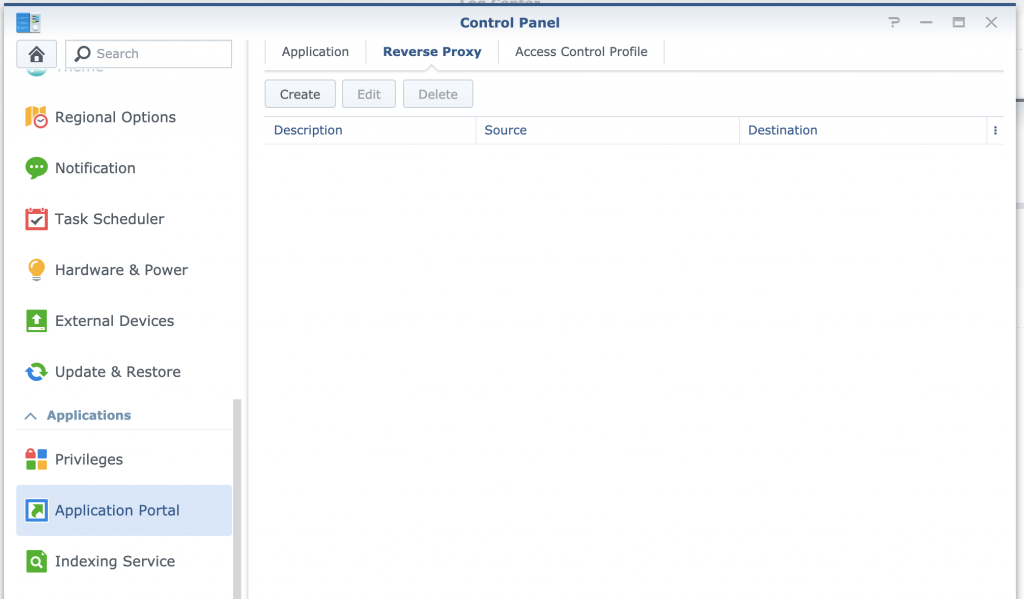
Before we run the docker image, let’s finish setting up the reverse proxy and create a Let’s Encrypt certificate so it is reachable from the internet. To do so, let’s open Application Portal in the Synology Control Panel, then go to Reverse Proxy.
Reverse proxy setup
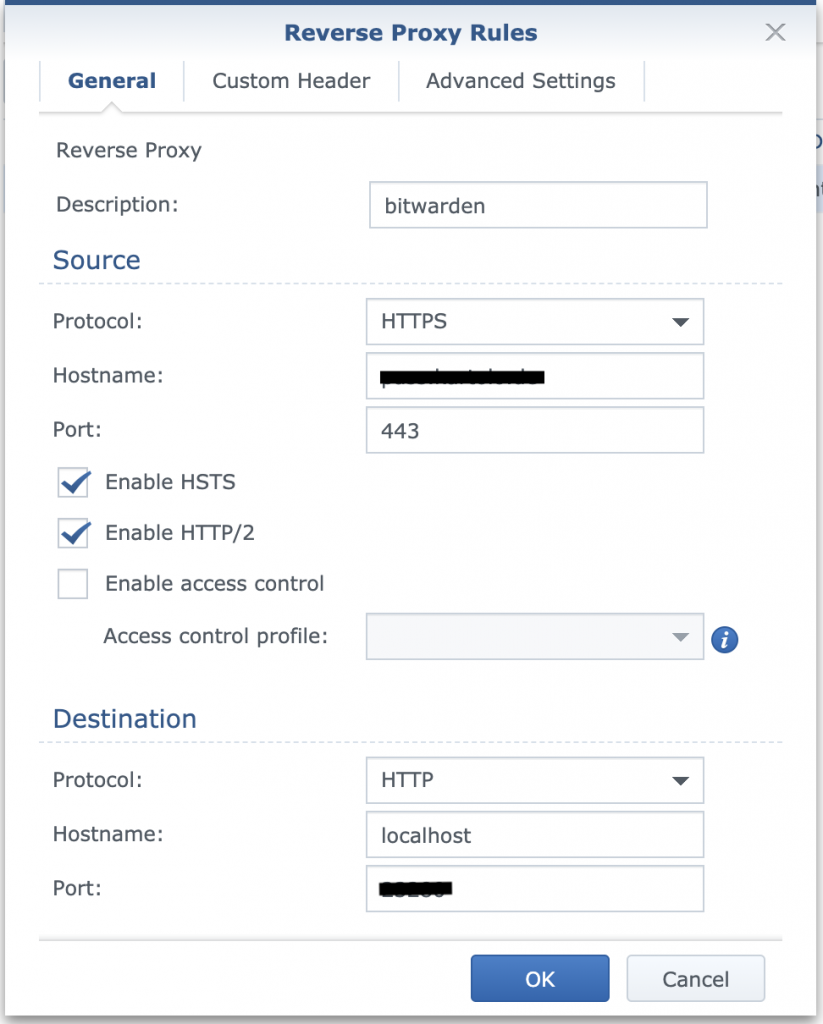
Let’s create a new reserve proxy setting. In Hostname put your domain (e.g. bitwarden.domain.tld). Set port to 443 (https). In the destination section, hostname is localhost and port is the port number you set in the docker settings.
After setting the reverse proxy, we stay in Control Panel and do the Security. In the Certificate panel, generate a Let’s Encrypt certificate for the domain you choose before in the Reverse Proxy setting.

That’s all. Start your Bitwarden_rs docker and your Bitwarden server will be available under the domain you choose earlier, assumed you already managed to set DNS for the chosen domain to your router IP and you set port redirect on your router, to route port 443 to your Synology NAS.
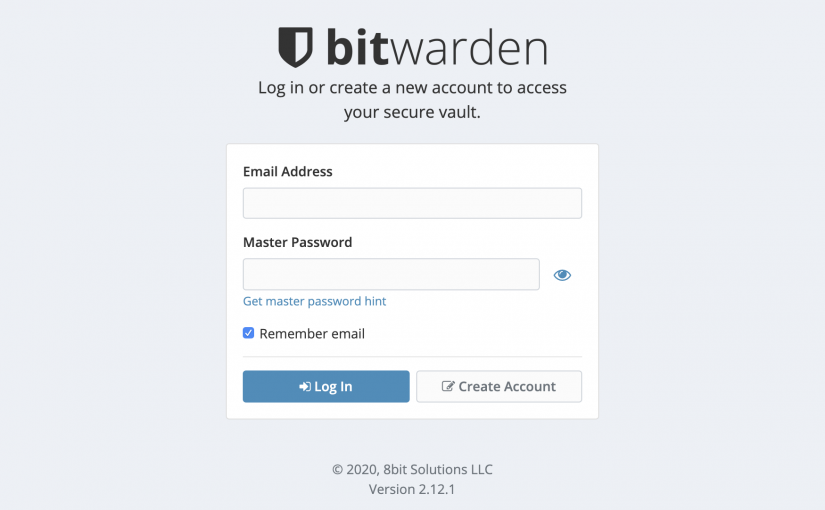
If bitwarden is reachable and you’ll get bitwarden login mask. User creation is open to anyone. So you’ll be better deactivate this.

There are some way to deactivate user registration:
- per docker environment
- per bitwarden admin panel
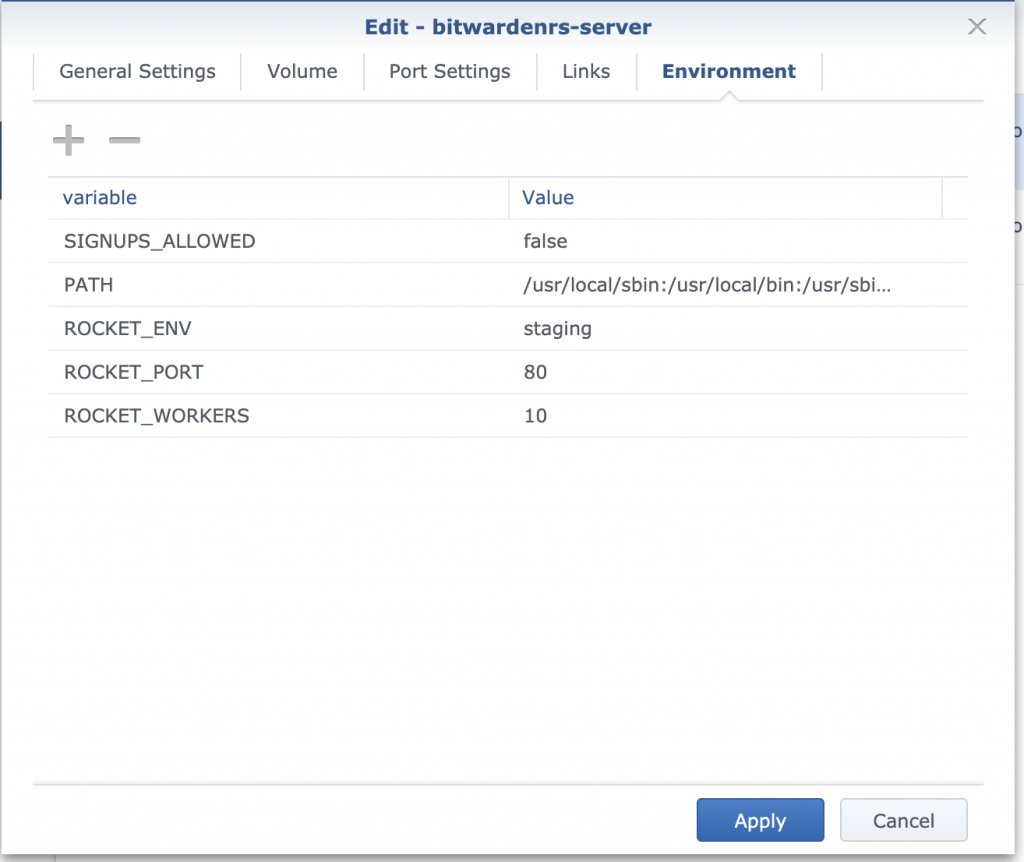
To disable registration, just go back to the container setting in docker, and set SIGNUPS_ALLOWED to false. Then restart the container. The create account button is still visible, but user gets an error if they try to register themself.
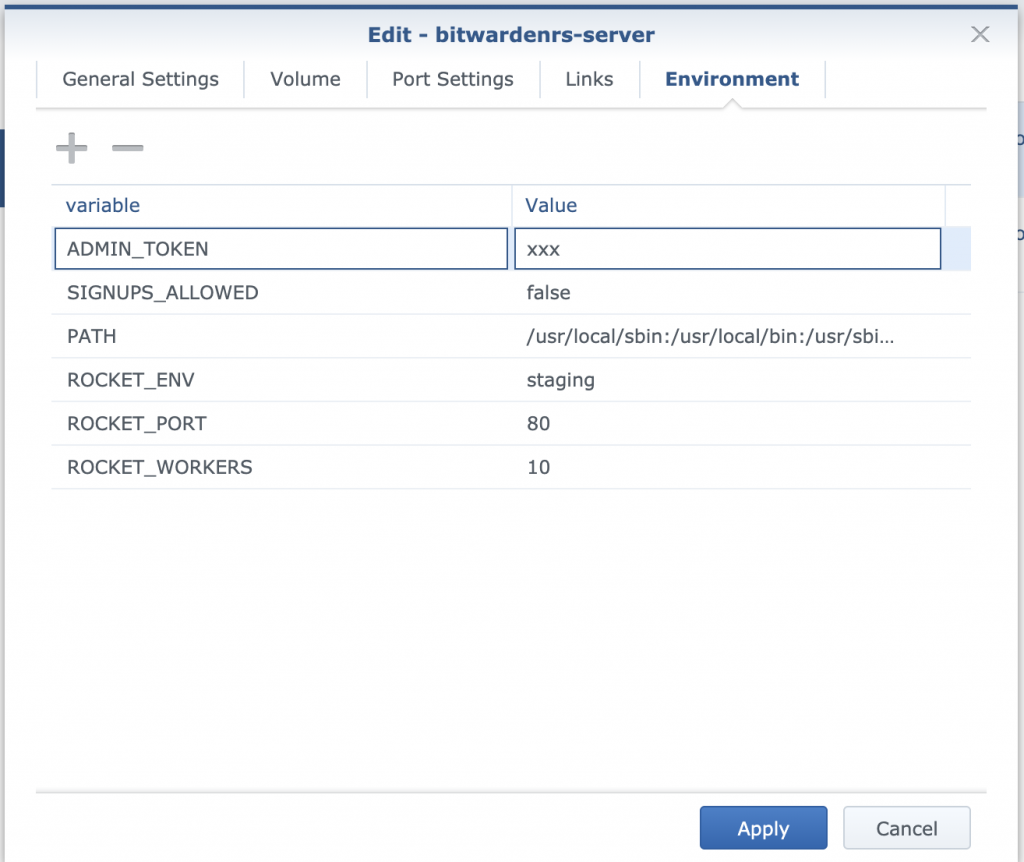
Another way is using the bitwarden admin panel. On this panel there’re more settings you can change. To enable the admin panel, go to the container setting and set ADMIN_TOKEN environment parameter. As value set to some token.
Then go to bitwarden and add /admin in the URL (e.g. bitwarden.domain.tld/admin). In the login mask, enter the admin token you set earlier. There you can disable the create account. The settings will be written in a config.json file in the docker volume. So secure this file.
See the wiki of bitwarden_rs to get more documentation on the docker environment settings. See https://github.com/dani-garcia/bitwarden_rs/wiki
Hello,
Forgive my English. First of all, thank you for this great tutorial.
But I have a question. To make the backup, we only have to back up the data directory we set up?
not quite. you can backup the attachment directory as it is, but you can’t just copy the sqlite database file. I use bruceforce/bw_backup image to create sqlite dump file. I’ll write a how-to some day :)
just wrote a short blog to backup the bitwarden data. See https://www.kartolo.de/2020/04/13/backup-bitwarden_rs-data-on-synology/
Hi, nice tutorial. You use reverse proxy, but if i only want to use it into the LAN so without external access from the internet and i want to use a selfsigned Certs?
I don’t want to use a reverse proxy. i used to call in browser the sinology ip and use the local ports that docker assign to the container. It worked for a while without https but now it is mandatory the use of https and ssl. I want to use self signed certificate made into sinology. Any advices?
You could create and import a self signed certificate in Synology. Or put a nginx docker before the bitwarden and set the self signed certificate in the nginx container. Don’t forget to import your self signed certificate in your client (OS or browser).
You have to set the DOMAIN URL parameter to http://your_syno_IP:bitwarde_port
“http://172.16.10.10:6603”
2 way to do that:
by environment Variable (i still didnt descover the Domain URL variable name
accessing Bitwarden ADMIN PANEL:
first add Environment variable “ADMIN_TOKEN” = “Your admin panel passxord”
The go to “your_IP/admin and set the parameters.
Hope this help.
Hi, thanks a lot for the great tutorial. I would like to ask you how to update Bitwarden since it’s installed in Docker and will they release new updates? Thank you.
Hi,
just updated my installation yesterday. Following steps are done:
* download the latest image
* while downloading, take notice of the ports, volume and environment parameters. compare with the config.json. maybe some of the environment parameters are in the config.json, so you don’t need to set them again
* if the image is downloaded, stop and remove the bitwarden container
* create a new container based on the latest image and set the ports, volume and environment parameters
Hi,
Invite multiple people. But how?
Thank you for your good instructions.
I installed Bitwarden_rs on my Synology and can also access it from home.
I wanted to invite a second person, unfortunately Bitwarden does not send out an email.
Do you have to configure SMTP in the NAS or what settings have to be configured on the NAS so that several people can use Bitwarden.
Hi,
did you enable invitation? See Github
Did you check the SMTP configs?
In
config.jsonI found following settings:"invitations_allowed": true,
"smtp_host": "MAIL-DOMAIN",
"smtp_ssl": true,
"smtp_explicit_tls": false,
"smtp_port": 587,
"smtp_from": "FROM_EMAIL",
"smtp_from_name": "Bitwarden_RS",
"smtp_username": "USERNAME",
"smtp_password": "PASSWORD",
"smtp_timeout": 15,
Hi,
First, thank you for a great article! I tried creating an account but nothing happens when I hit SUBMIT. I didn’t disable account creation through the environment settings.
Thank you!
I just want to set up a reverse proxy, but I get the message “This domain name is already in use” when I enter (slightly modified here): string.spdns.org.
Currently I am still running Pi-Hole in a Docker container, which is accessed via string.spdns.org:8181/admin.
Do you guys have any suggestions on what I can do?
@Darwin. Same here. I was able to create an account through browser add-on.
Hi. Thank you for your tutorial. For me it works until I want to create a bitwarden account. I can fill all credentials but when I want to complete the registration just nothing happens. No error and nothing. Any idea?
do you set SIGNUPS_ALLOWED to true for the first registration. See https://github.com/dani-garcia/bitwarden_rs/wiki/Disable-registration-of-new-users
Or you could invite a user using the administration panel. See https://github.com/dani-garcia/bitwarden_rs/wiki/Enabling-admin-page
First I haven’t set SINGUPS_ALLOWED. Not to false and not to true. Now I set it to true. Still not possible to create an user. Didn’t try it with administraiont panel. Shouldn’t it work “normally”?
Hans wrote on the 21st of February that he has created one using the browser add-on. But doesn’t that only create an user at bitwarden’s server?
And this question leads to the next one…Is it possible to use the browser add-on with self hosted bitwarden? Because if not, than I’ll leave it anyway…
yes, I use official Chrome add-ons and Android app with my bitwarden-rs installation.
Please use the web inspector in browser, to check if there’s a failed request (websocket, an so on)
There is an error. But I don’t have a clue what to do:-):
core.js:4127 ERROR Error: Uncaught (in promise): TypeError: Cannot read property ‘importKey’ of null
TypeError: Cannot read property ‘importKey’ of null
at e. (webCryptoFunction.service.ts:47)
at main.c9c57acc9b845fdb9052.js:1
at Object.next (main.c9c57acc9b845fdb9052.js:1)
at main.c9c57acc9b845fdb9052.js:1
at new t (zone.js:913)
at r (main.c9c57acc9b845fdb9052.js:1)
at e.pbkdf2 (main.c9c57acc9b845fdb9052.js:1)
at e. (crypto.service.ts:319)
at main.c9c57acc9b845fdb9052.js:1
at Object.next (main.c9c57acc9b845fdb9052.js:1)
at w (zone.js:832)
at zone.js:739
at s (main.c9c57acc9b845fdb9052.js:1)
at t.invoke (zone.js:386)
at Object.onInvoke (core.js:28144)
at t.invoke (zone.js:385)
at e.run (zone.js:143)
at zone.js:891
at t.invokeTask (zone.js:421)
at Object.onInvokeTask (core.js:28132)
See https://github.com/dani-garcia/bitwarden_rs/issues/153
Are you serving only http and using Chrome?
Thought I set up everything with https. But it looks like it only uses http. Have to find out what went wrong.
Firstly, thank you very much for these guides… You have a style that is both clear and concise.
Right now, I have bitwarden installed, along with fail2ban (that took some time to get going). I will be looking at your advice for the backups of the database next. A most important step!
However, my question concerns fail2ban. Although it works, I an struggling and failing to setup email notifications for this! Such as when fail2ban starts/stops and especially the notification when a client is banned. I found one or two articles, but they do not concern the Synology, with its various specifics.
Would you perhaps offer some pointers for an out-of-his-depth Docker child?
I got emails working but not the actual blocking. We should compare notes!
John, here’s how I got email working:
This is docker-compose:
====
version: “3.5”
services:
fail2ban:
container_name: fail2ban
restart: unless-stopped
image: crazymax/fail2ban:latest
network_mode: “host”
cap_add:
– NET_ADMIN
– NET_RAW
environment:
– TZ=Europe/Amsterdam
– F2B_DB_PURGE_AGE=30d
– F2B_LOG_TARGET=/data/fail2ban.log
– F2B_LOG_LEVEL=DEBUG
– F2B_IPTABLES_CHAIN=INPUT
– SSMTP_HOST=smtp.gmail.com
– SSMTP_PORT=587
– SSMTP_HOSTNAME=localhost
– [email protected]
– SSMTP_PASSWORD=mysupersecretpassword
– SSMTP_TLS=YES
– SSMTP_STARTTLS=YES
volumes:
– “/volume1/docker/fail2ban:/data”
– “/var/log:/var/log:ro”
– “/volume1/docker/fail2ban/jail.local:/etc/fail2ban/jail.local”
– “/volume1/docker/authelia/logs:/logs/authelia:ro”
– “/volume1/docker/npm/data/logs:/logs/npm:ro”
====
The contents of my jail.local:
====
[DEFAULT]
ignoreip = 127.0.0.1/8 172.17.0.0/16
bantime = 2592000
findtime = 86400
maxretry = 4
backend = auto
mta = sendmail
destemail = [email protected]
sendername = [email protected]
====
Then, for example, my authelia.conf in jail.d folder shows:
====
[authelia]
enabled = true
port = http,https,9091
filter = authelia
action = iptables-allports[name=authelia]
sendmail-whois[name=Bitwarden, [email protected]]
logpath = /logs/authelia/authelia.log
maxretry = 6
bantime = 1d
findtime = 3600
====
That’s it.
Now… if only I can get blocking working ;)
Hi Erwin,
my fail2ban docker-compose file is:
#---#Docker-compose file for Fail2ban
#---
version: '3'
services:
fail2ban:
container_name: fail2ban
restart: always
image: crazymax/fail2ban:latest
environment:
TZ: "Europe/Paris"
F2B_DB_PURGE_AGE: "30d"
F2B_LOG_TARGET: "/data/logs/bitwarden.log"
F2B_LOG_LEVEL: "INFO"
F2B_IPTABLES_CHAIN: "INPUT"
SSMTP_HOST: "MAILSERVER.TLD"
SSMTP_HOSTNAME: "HOSTNAME"
SSMTP_PORT: "587"
SSMTP_USER: "MAILUSER"
SSMTP_PASSWORD: "MAILPASS"
SSMTP_STARTTLS: "NO"
SSMTP_TLS: "YES"
volumes:
- /volume1/docker/fail2ban/fail2ban:/data
- /volume1/docker/bitwardenrs/logs:/bitwarden:ro #mount the bitwarden log
network_mode: "host"
privileged: true
cap_add:
- NET_ADMIN
- NET_RAW
and bitwarden.conf in jail.d
[DEFAULT]
ignoreip = 127.0.0.1/8 192.168.168.0/22
#Ban for 30 days
bantime = 2592000
findtime = 86400
maxretry = 2
backend = auto
action = iptables-allports[name=bitwarden]
destemail = MAIL
sender = MAIL
[bitwarden]
enabled = true
port = 80,8080,443,8443
filter = bitwarden
logpath = /bitwarden/bitwarden.log
and bitwarden.conf in filter.d
[INCLUDES]before = common.conf
[Definition]\. Username:.*$
failregex = ^.*Username or password is incorrect\. Try again\. IP:
ignoreregex =
Thanks!
I’m a little confused about [DEFAULT] … do I still add that for every jail i create?